If you are, think about prenatal yoga, which can be a good way to stay fit and limber, while also helping to manage stress. Whether you’re already an active yogi, or considering taking up the challenge for the first time, you may find that prenatal yoga is relaxing and enjoyable, not to mention the fact that it can also help prepare your mind and body for labor and delivery.
What’s So Great About Yoga During Pregnancy?
For starters, yoga during pregnancy helps tone your muscles, and some positions may help relieve back pain. Most positions suitable for pregnant women have a low impact on joints, making yoga a safer and more comfortable choice than other, more demanding types of exercise.
Yoga also focuses on breathing techniques and meditation, strategies that can prepare you for labor by helping you manage stress and pain. And, although you can certainly practice in the comfort of your living room, if you choose to get out and join a pregnancy yoga class, you’ll have the added benefits of meeting other moms-to-be, swapping experiences, and building friendships.
Prenatal Yoga for Every Trimester
As with other forms of exercise, yoga for pregnant women needs to be tailored a bit for each trimester.
Prenatal Yoga in First trimester-
Once you know your due date, the next step is to check with your healthcare provider before beginning or continuing to practice yoga during pregnancy. Next, you’ll want to find an instructor with prenatal yoga experience, or at least inform your current instructor of your pregnancy. Although there generally aren’t too many restrictions at this stage, it’s probably best to slow down a bit and not push yourself too hard. Read about the first trimester of pregnancy to know the changes your body is going through at this phase.
Prenatal Yoga in Second trimester-
Be aware of your changing body and shifting sense of balance. Move more slowly, and don’t hold poses for longer than they are comfortable. You’ll want to start using a wedge or pillow to raise your upper body when lying down Learn more about the state of your body in the second trimester of pregnancy.
Prenatal Yoga in Third trimester –
Now is the time to really slow down and take precautions. It’s a good idea to do standing poses against a wall, or use a chair to steady yourself. You can also use blocks or straps for stability. Keep moving slowly, and don’t hold poses very long. Read about the third trimester of pregnancy to understand the pregnancy symptoms & how your baby grows during this phase of pregnancy.
Exercising During Pregnancy: A Few Dos and Don’ts to Remember
Do’s –
- Stay hydrated — drink plenty of water before, during, and after yoga.
- Listen to your body. If anything is uncomfortable, stop!
- Take breaks.
- Wear loose-fitting layers.
- Check with your healthcare provider before engaging in any exercise.
- You can start your yoga like sukshma exercises like shoulder movement, arm stretching, neck rotation, knee rotation ankle rotation, hip rotation etc because you can feel better in your joint pain during pregnancy.
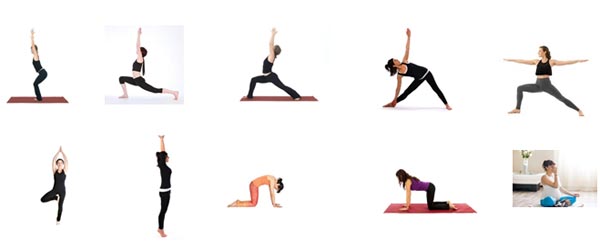
- Then slowly can start stretching like tadasana, trikonasana, virbhadhrasana, vrikshasana in standing pose and two other pose like cow pose and cat pose.
- Primarilly start anulom vilom pranayama with this standing yogasana .and approximately total session should be 40minutes

How to do Tadasana
- Lift up all of your toes and fan them out, then drop them back down to create a wide, solid base. You can separate your heels slightly if your ankles are knocking together uncomfortably.
- Let your feet and calves root down into the floor.
- Engage your quadriceps (the muscles on the front of your thighs) and draw them upward, causing your kneecaps to rise.
- Rotate both thighs inward, creating a widening of the sit bones.
- Maintain the natural curves of your spine.
- Tone your belly, drawing it in slightly.
- Widen your collarbones and check that your shoulders are stacked over your pelvis.
- Shrug your shoulders up to your ears and then roll them back to release your shoulder blades down your back.
- Let your arms hang naturally with the elbows slightly bent and the palms facing forward.
- Your neck is long, your chin is neither tucked down nor lifted up, and the crown of your head rises toward the ceiling.
- Once you have checked all your alignment points, take 5 to 10 breaths while you hold yourself in this position
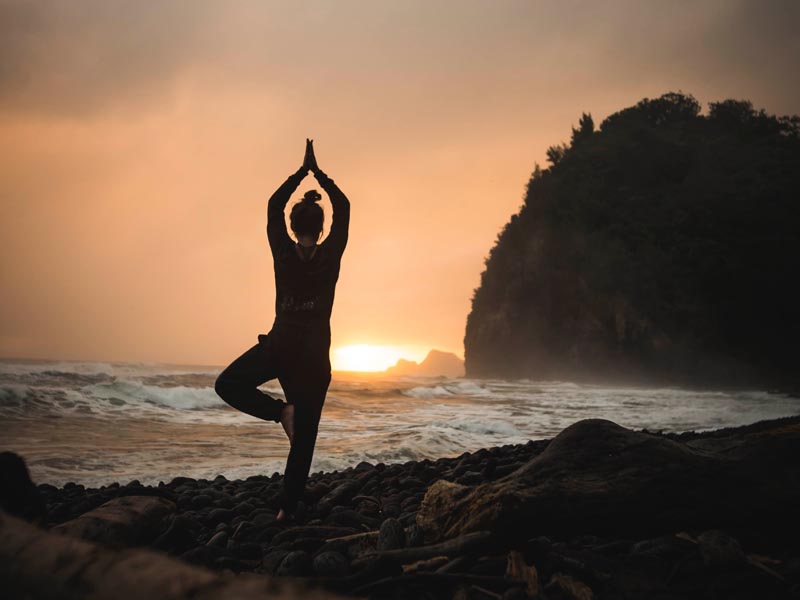
How to do Vrikshasana
Stand straight.
Balance firmly on your left leg and lift your right leg. Bend your right leg at the knee.
Now, place your right foot against the inside of your left thigh. Make sure the toes of your right foot facing downward.
Join your palms in prayer at your chest level. Now, lift your arms over your head till your hands are stretched upward.
Hold the position while breathing deeply.
Lower your arms to chest level and then separate your palms.
Straighten your right leg and stand erect again.
Repeat the posture with your right leg.
Warrior I (Virabhadrasana)
Steps:
From mountain pose, take a big step back with your left leg so that your left foot is pointing to the left about 45 degrees. Feet should remain hip width apart. The body faces the front of the mat. Bend your front knee and thigh, keeping the weight in the front heel and big toe and the back foot is pressing from the outer heel. Square the hips and ensure the knee is directly above the ankle. On an inhalation lift the arms up straight, releasing the shoulders from the ears and widen the shoulder blades.
Stay in the pose 5-15 breaths. Come out on an inhalation, pressing your back heel as you straighten the front leg and lower the arms. Then step the back foot forward to return to mountain before performing the pose on the other side.
How to do Marjariasana (cat pose)
Cat Pose: Step-by-Step Instructions
Step 1
Start on your hands and knees in a “tabletop” position. Make sure your knees are set directly below your hips and your wrists, elbows and shoulders are in line and perpendicular to the floor. Center your head in a neutral position, eyes looking at the floor.
Step 2
As you exhale, round your spine toward the ceiling, making sure to keep your shoulders and knees in position. Release your head toward the floor, but don’t force your chin to your chest.
Step 3
Inhale, coming back to neutral “tabletop” position on your hands and knees.
This pose is often paired with Cow Pose on the inhale for a gentle, flowing vinyasa.
How to do Cow Pose: Step-by-Step Instructions
Step 1
Start on your hands and knees in a “tabletop” position. Make sure your knees are set directly below your hips and your wrists, elbows and shoulders are in line and perpendicular to the floor. Center your head in a neutral position, eyes looking at the floor.
Step 2
As you inhale, lift your sitting bones and chest toward the ceiling, allowing your belly to sink toward the floor. Lift your head to look straight forward.
Step 3
Exhale, coming back to neutral “tabletop” position on your hands and knees. Repeat 10 to 20 times.
Step 4
This pose is often paired with Cat Pose on the exhale for a gentle, flowing vinyasa.
How to do Anulom Vilom pranayama
– Always sit in Sukhasana with your hands resting sideways on the knees.
– You can also sit in Padmasana.
– If you begin from the left then close the right nostril with your right thumb and inhale slowly to fill up your lungs.
Now, exhale slowly from the right nostril.
– It is essential to focus on your breath and practice the technique slowly.
– Repeat 60 times or for 5 minutes. You can do this any time of the day.
– Ensure that your back is straight and shoulders relaxed while you perform the pranayam.
Step-by-Step Instructions
Begin in Triangle Pose (trikonasana) with the right leg forward. Bend your right knee softly and bring your left hand to your hip.
Bring your right hand to the floor in front of your right foot. Your hand should be under your shoulder when you are in the full pose, so in order to set it up in the correct position, place it about a foot in front of and 5 or 6 inches to the right of your right foot. Tent your hand so that just your fingertips on the floor.
Begin to straighten your right leg while simultaneously lifting your left foot off the floor. Keep your left leg as straight as possible.
Open your hips, stacking the left hip point on top of the right hip point.
Bring your left leg straight and parallel to the floor. Flex your left foot strongly with the toes pointing toward the left side of the room.
When you feel balanced on the right leg, reach the left arm up toward the ceiling, opening the chest and making a straight line with the right and left arms perpendicular to the floor.
Finally, turn your head so that your gaze is lifted toward your upraised left fingertips.
The balance here for around five breaths before releasing the left leg to the floor and repeating the pose on the other side.
Do these all yoga asanas and pranayama with focus on your breathing. Your stomach should be empty during practice like you can practice only morning or evening only

Dr. Sujata Panda
PhD in Yoga, DNYS, N.D.,
Gold medallist,
Founder of Su-Ham Foundation
Owner of Viroga Virtual Clinic


